

Thursday, October 31, 2013
Wednesday, October 30, 2013
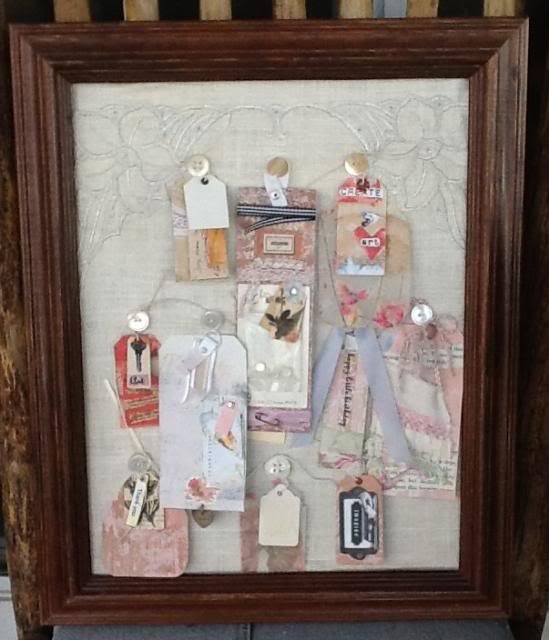
Tag Board
Here is a quick project I created using tags that I made. I covered a piece of cardboard with vintage linen. I sewed buttons onto the linen to hang my tags on. I mounted it in a frame and hung my tags on the buttons. I think it needs a few more buttons and tags, but it's a start.

Tuesday, October 29, 2013
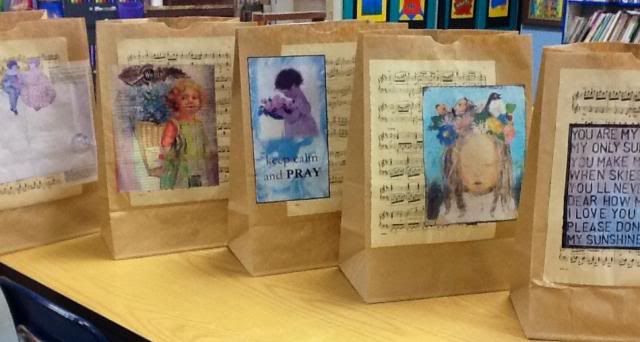
Recycled Bags
I decided that when I do the sale in November I will have pretty bags for the bigger purchases that people make. I had about 15 grocery bags that I started with. I decoupaged vintage sheet music over the advertisements and then I added some pretty images on top of that. I will add some tags with my blog address to the bags. I hope it will be a special treat for shoppers!

Sunday, October 27, 2013
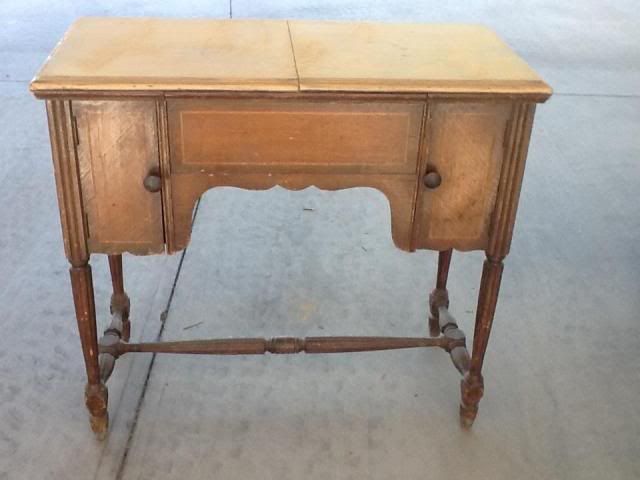
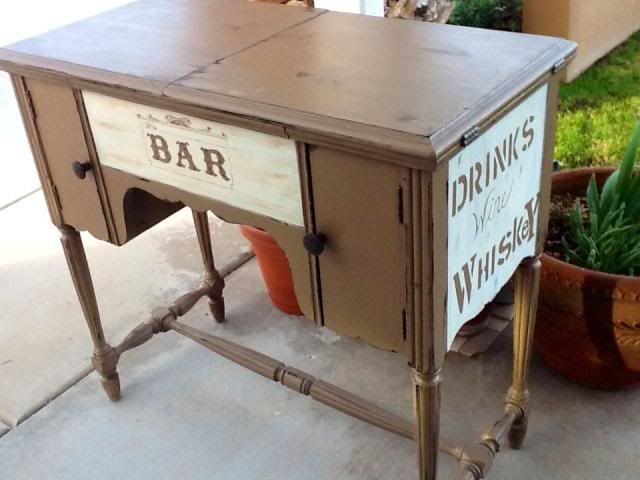
Portable Bar
This Saturday I went to a picnic with my dad. On my way, I stopped at a school that was having a sale. I found a few treasures! Ok, lots of treasures! So many big items that I had to call my mister to come and cart them home. Let me tell you, there wasn't a soul at the sale that thought I made good buys, except me of course. There was a man there that delighted in telling me what he thought of my purchases. Well, game on! I worked all today on this bar cabinet. This was a sewing cabinet in its prior life. I sanded it, painted a base coat on it and then painted the print on. I saw a dresser at Bliss Ranch that was done using this technique. I will take another picture when I stock the inside. The top opens up, there is room for bottles, glasses, and fun stuff that can go in the little side doors.
 I STARTED SANDING THE TOP OF THE CABINET BEFORE I REMEMBERED TO TAKE A PICTURE!
 I STARTED SANDING THE TOP OF THE CABINET BEFORE I REMEMBERED TO TAKE A PICTURE!

Friday, October 25, 2013
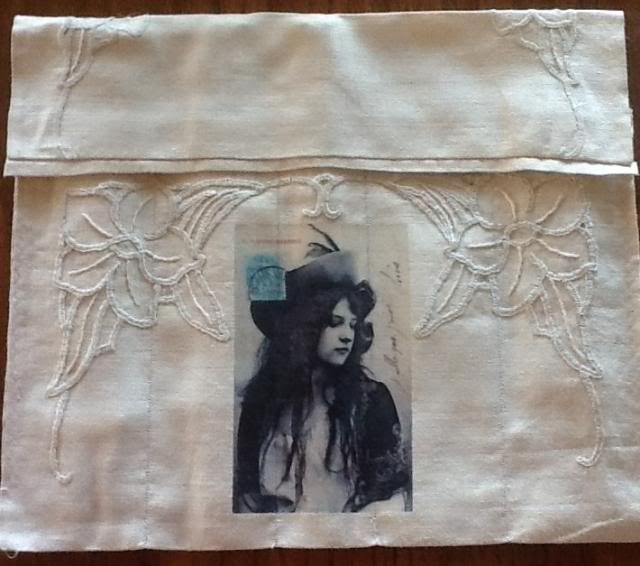
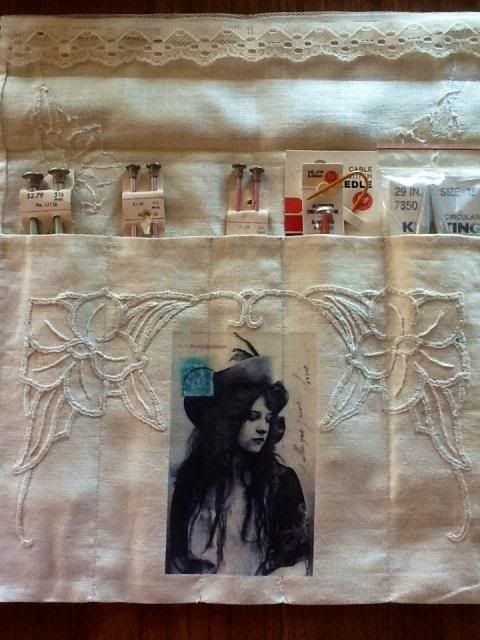
Knitting Needle Case
Today I was playing around with some old linens and I thought it would be fun to make a case/sleeve for knitting needles. I took a beautiful old linen piece and ironed it to the shape I wanted to make my holder. I sewed up the sides and then I sewed some seems to make the little pockets for the needles. I added a fabric image to the outside to make it just that much sweeter.
 case
case

 case
case
Monday, October 21, 2013
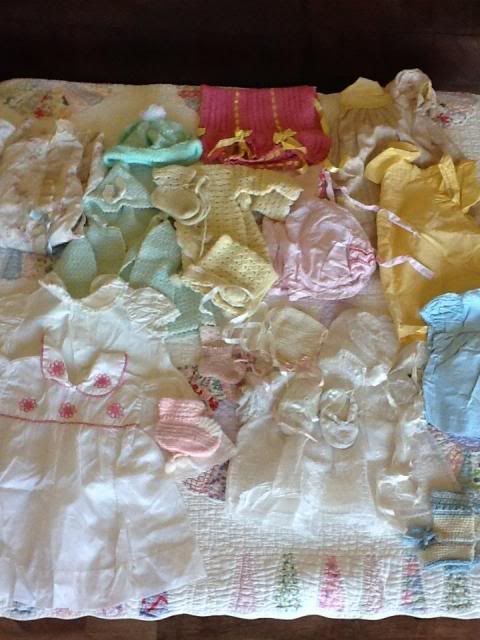
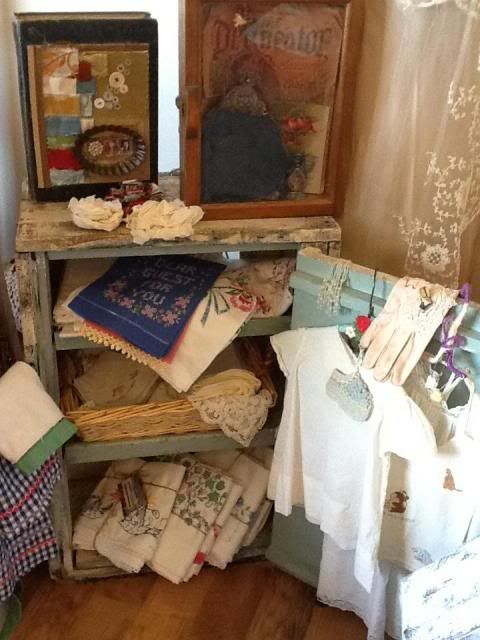
Vintage Baby Clothes
I'm still thinking I should do the vintage flea market in Cave Creek, Arizona in November. I rounded up some vintage baby clothes I would like to put in the sale. There are knitted sweaters and booties, little dresses and a beautiful little christening gown with a cap & booties.

Sunday, October 20, 2013
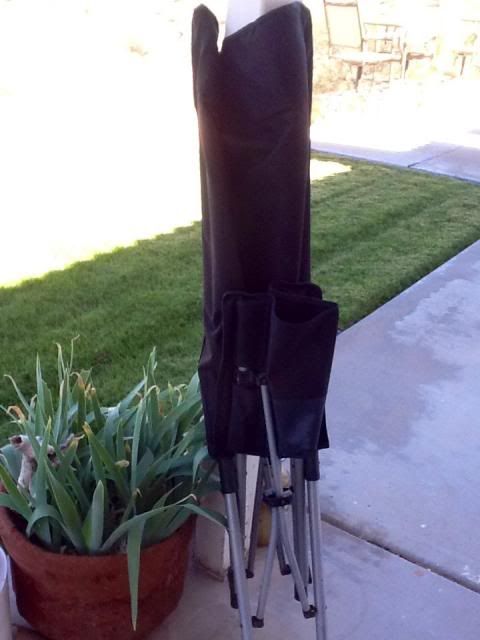
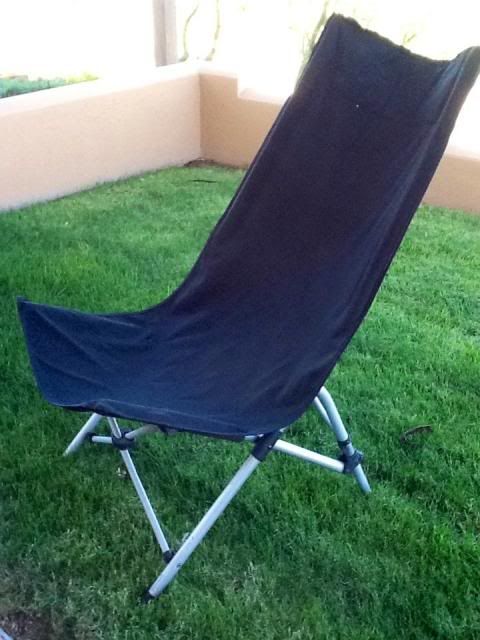
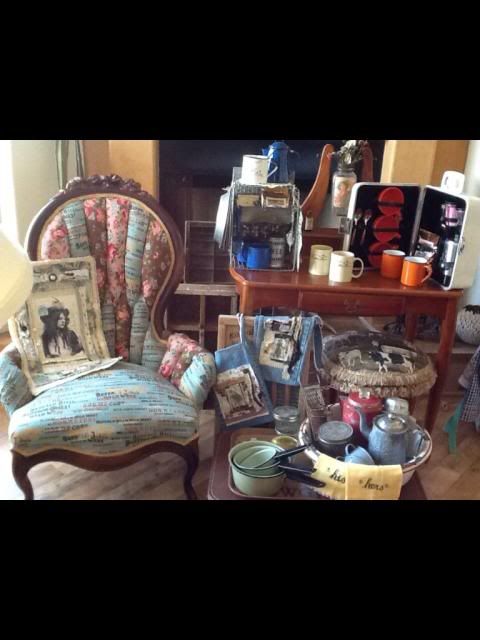
Quilted Canvas High-back Chair
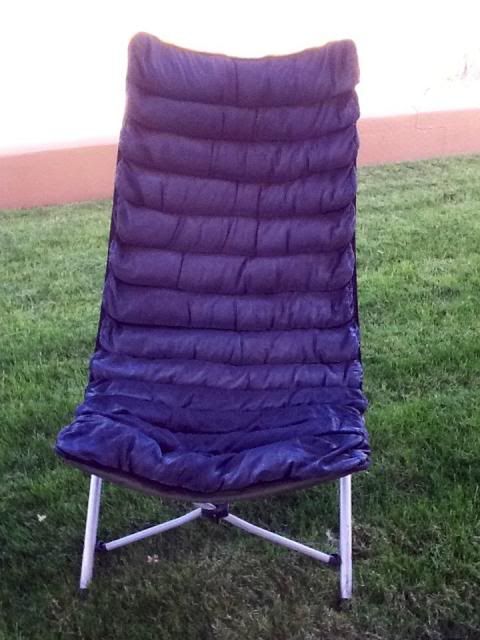
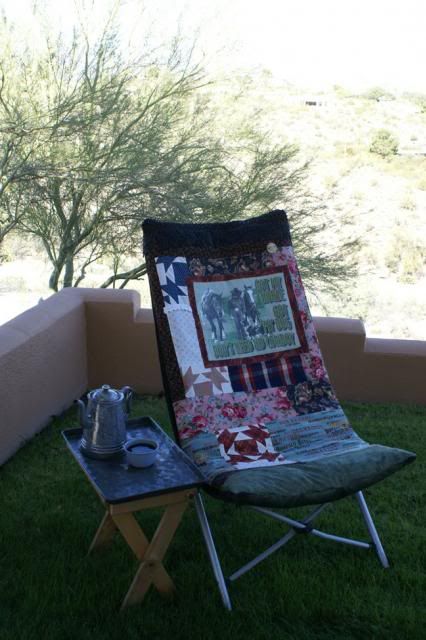
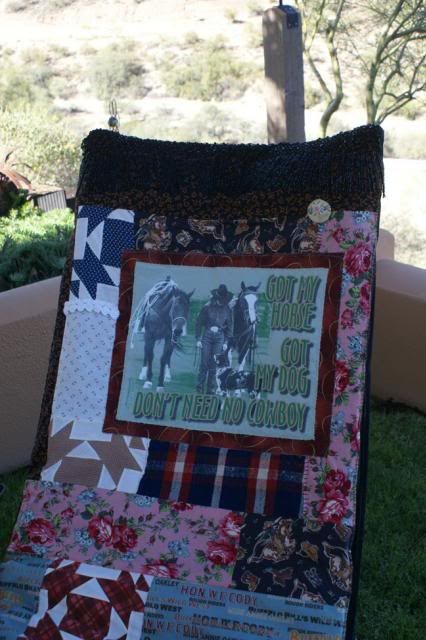
This project started with an adorable t shirt that I found at a tag sale. I decided to use it on a pillow. I started taking bits & pieces from my fabric stash, and started sewed them together. When I was about half way done I decided to make the pillow for a canvas high-back camp chair I bought. I took the half made pillow outside and laid it across the front of the chair. I forgot to mention that the chair has a removable bean-bag type cover. The front of the pillow was almost big enough to cover 1/2 the pad. I thought it would be so pretty to add more fabric and actually cover the front of the bean bag cover. I started this project at about 3:00 in the afternoon and I was still working on it at 10:00,(My husband was hunting). When I finished the front of the cover, I decided to add some batting to the back to give it support. I got all that done and had to hand stitch it to the canvas because it was to bulky for my sewing machine. By now I am so tired! I finally went to bed and got up bright and early to finish the cover. I got it all sewn down and decided it needed some little extra pretties! I stitched the black beaded fringe along the top, added a little lace and a pretty button, and did a lot of hand stitching. What do you think?
The little side table was made with old wood, and a vintage metal cookie sheet. Time to RELAX!!


Saturday, October 19, 2013
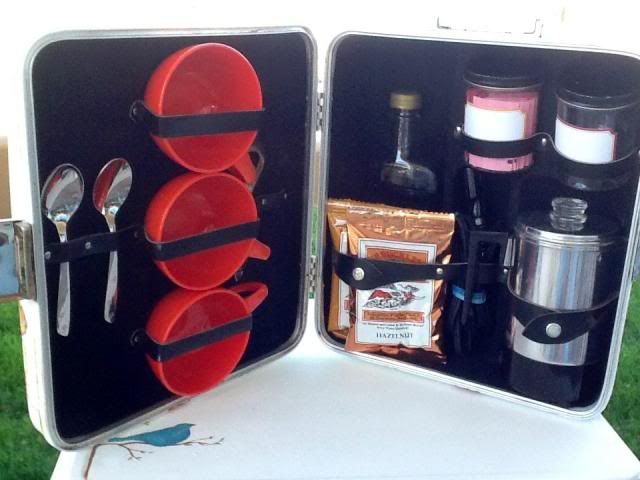
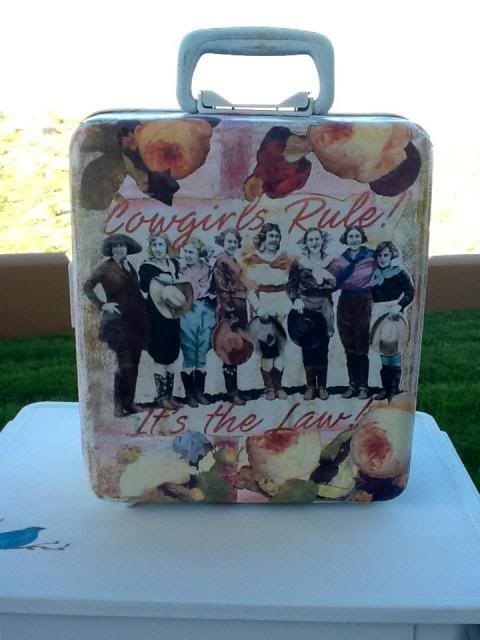
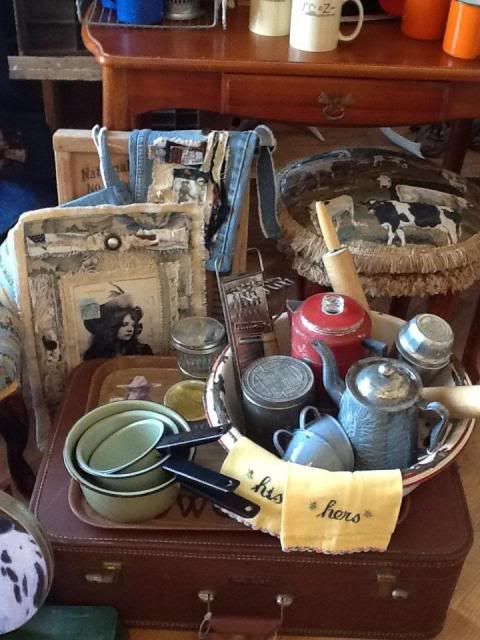
Vintage Coffee Accessory Case
Remember back to May, where I posted a blog about the coffee accessory case? Today I worked on the outside of the case. I had painted it white. Today I added a red stripe down the center. It didn't do a thing for me. I distressed around the edge. Just not working for me. I decoupaged the cowgirl picture on the front and then I added some red watercolor highlights. It was getting better. Then I added the decoupaged floral, and I loved it! Happy Dance!! On the back I decoupaged a cowgirl and a little floral print. It still needs a final coat of decoupage, but then this project will be complete! Hot diggity dog!!!


Friday, October 18, 2013
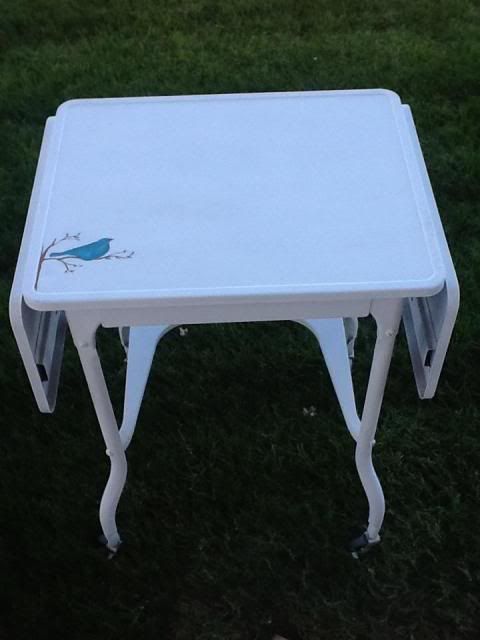
Metal Side Table
This is the perfect little piece! It can be a desk, a side table, a coffee station or a T.V. tray! It was gray metal and I painted it white and had it in my art room with a little t.v. on it. I got rid of the t.v. and I thought it would be good to sell. I painted a little bird and branches in the corner. Simple, sweet and will be perfect in the right home!

Thursday, October 17, 2013
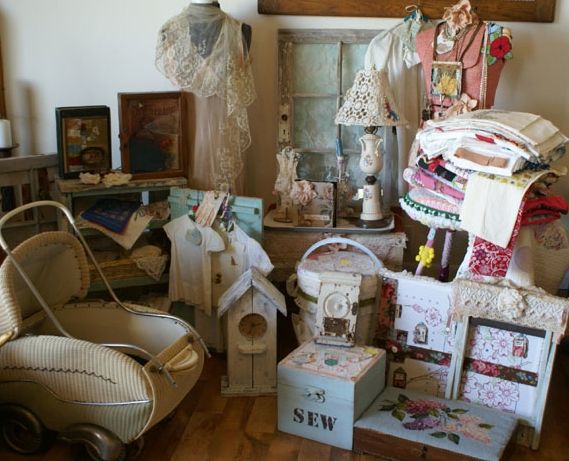
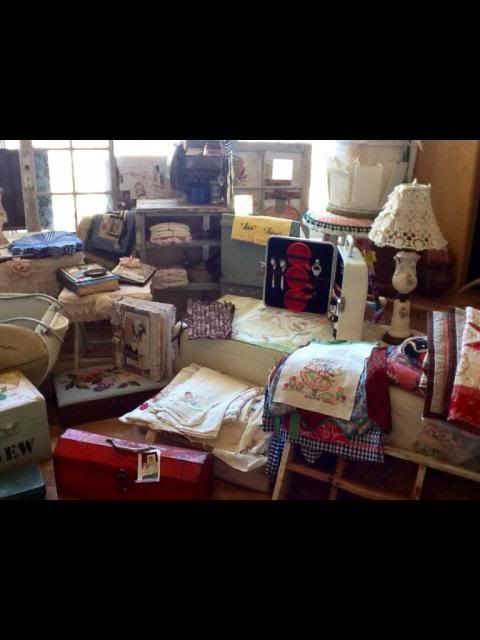
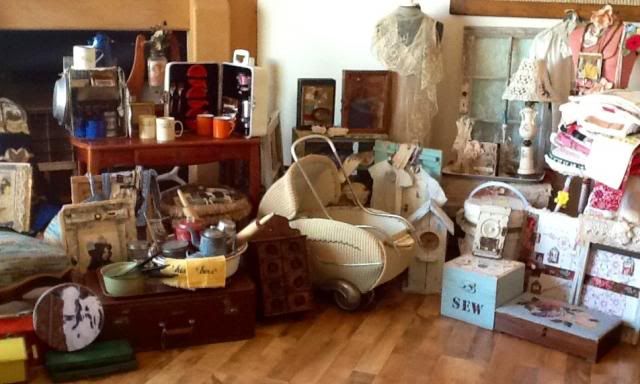
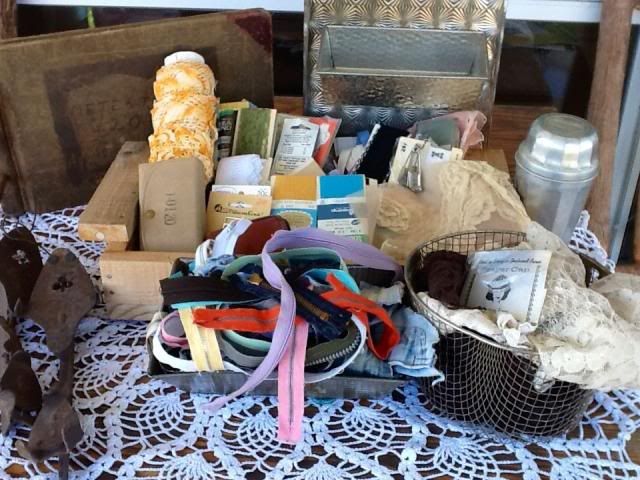
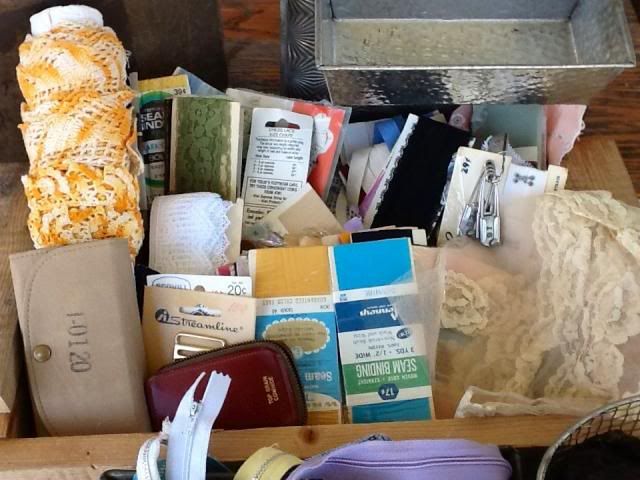
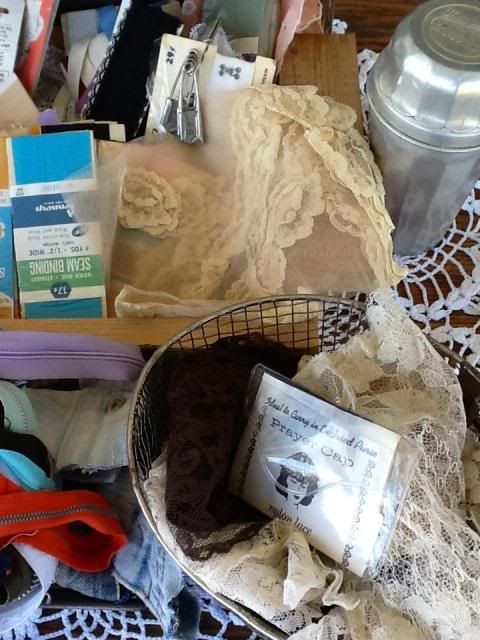
Vintage/Handmade Goods
Here I go, trying to get into a vintage market in November. It's time to share my treasures with like minded souls. I don't have any room left in my art room or in the storage shed, and I want to keep making things because it makes me so very happy! I have to submit pictures of my sales items, so I took pictures this morning. The good part is I feel like I have a nice mix of vintage and handmade. The bad news is, I didn't even get to the stuff in the storage shed. I am working on a very pretty desk and I have a bunch of projects I need to finish quickly if I am accepted into the show. Wish me big bunches of luck please!!


Wednesday, October 16, 2013
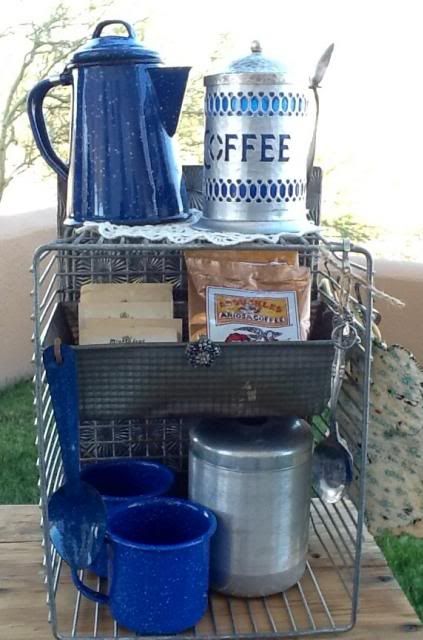
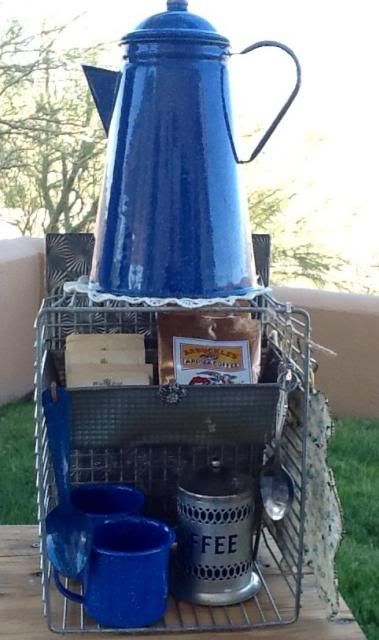
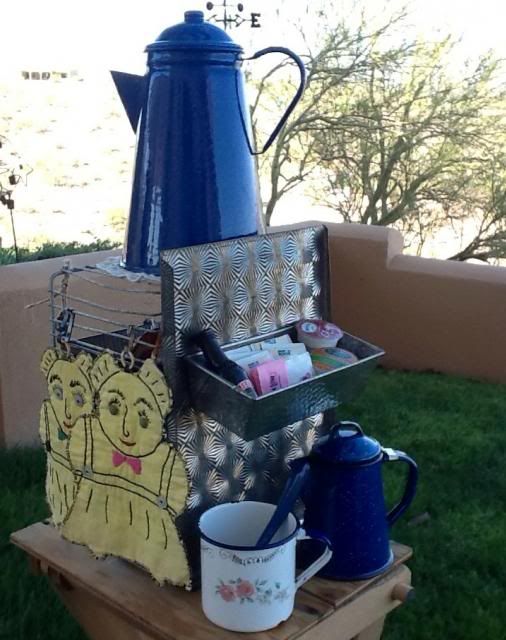
Coffee Station
When Cindy sent me my box of goodies, she also sent me a picture of a coffee station that was super cute. Well, that's what I made first! I had a metal basket that was just right for the base of the station. I took the bread pan she sent and I drilled and wired it inside the basket to hold coffee and tea. I put a small coffeepot, cups, spoons,etc. to display/use inside & on top of the basket. I hung 2 potholders on the side of the basket. I added the metal sheet with the pan to the back of the basket with a couple drill holes and wire. I filled the little pan with coffee fixings. I have a big and small coffee pot, so I put them both in the station along with a favorite camping cup! Did you notice my little stamped spoon in the front of the basket? Now this was a fun project!!


Tuesday, October 15, 2013
Sew Cool!
My sister rocks!! She went on a Junk Jaunt in Nebraska and brought all these treasures back for me! It may look like junk to you, but it set my imagination on fire! I am going to make at least 2 things from this stuff today, and I will post it on my blog tomorrow! Thank you Cindy!!


Monday, October 14, 2013
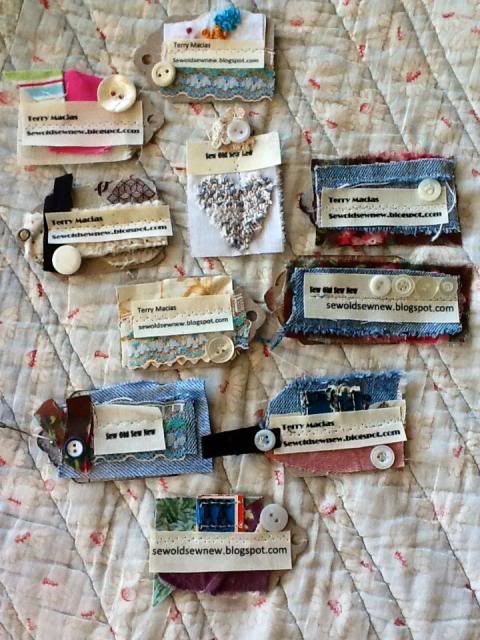
Sew Old Sew New Tags
I have a lot of people tell me that they keep the tags off the items they purchase from me. I like a pretty package, and I think it's worth spending a little extra time on my tags. Here are a few I worked on today!

Friday, October 11, 2013
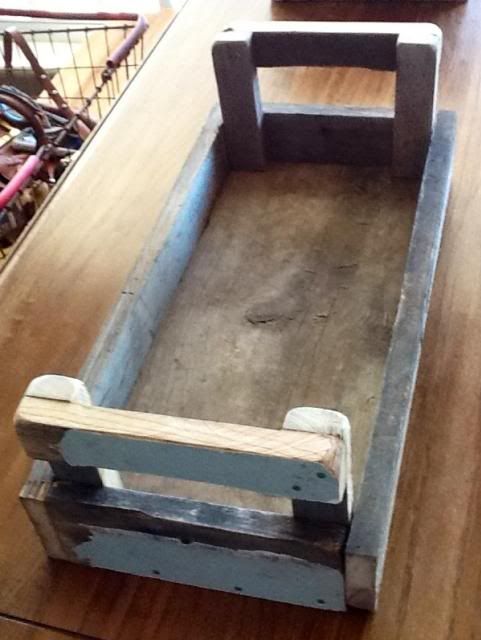
New/Old Wood Tray
My husband is being so creative this week. Here is the tray he made for me using the last of the barn wood he had.

Wednesday, October 9, 2013
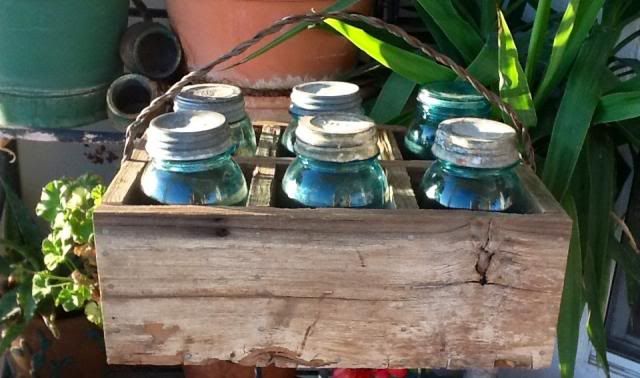
Old Wood Jar Box
My hubby made this jar box for me today. I love, love, love it! He had some old wood left from the tool box he made me, and ta-da, he surprised me with this box. The man does know the way to my heart! My old jars fit into it perfectly! What a happy day!

Tuesday, October 8, 2013
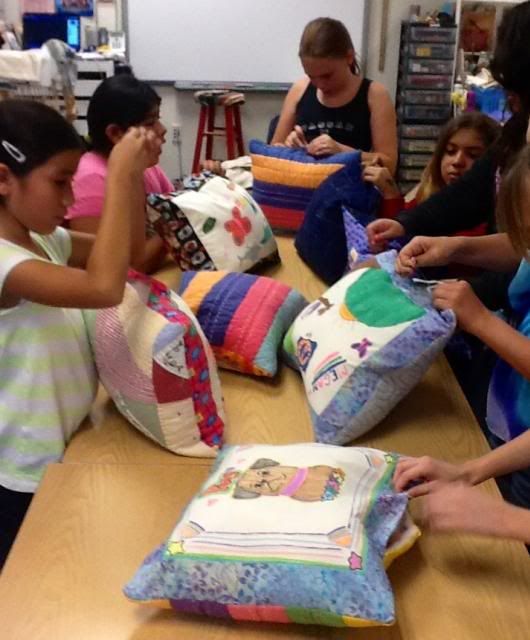
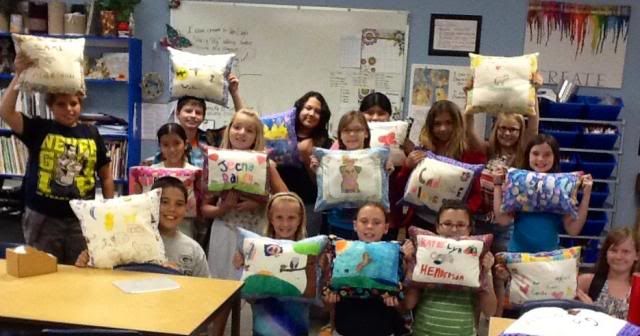
Art Club Pillow Update!
First step: Sewing the front pillow panels!
 Next step: The kids draw and color their pillow tops.
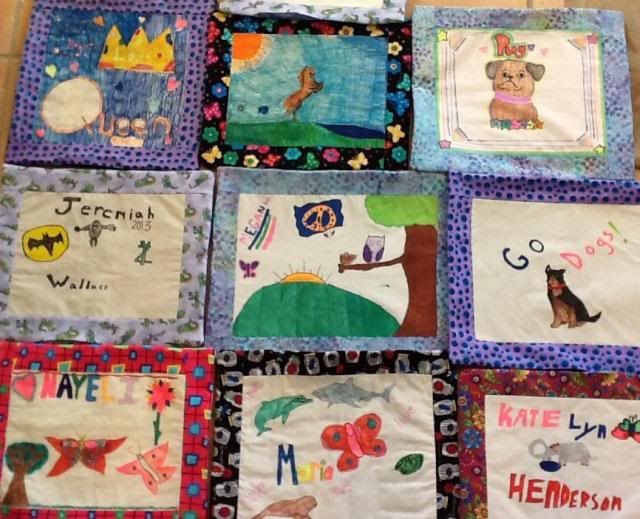 Last step: I sewed the pillow backs on and the kids stuffed their pillows and stitched them up!
 Next step: The kids draw and color their pillow tops.
 Last step: I sewed the pillow backs on and the kids stuffed their pillows and stitched them up!


Monday, October 7, 2013
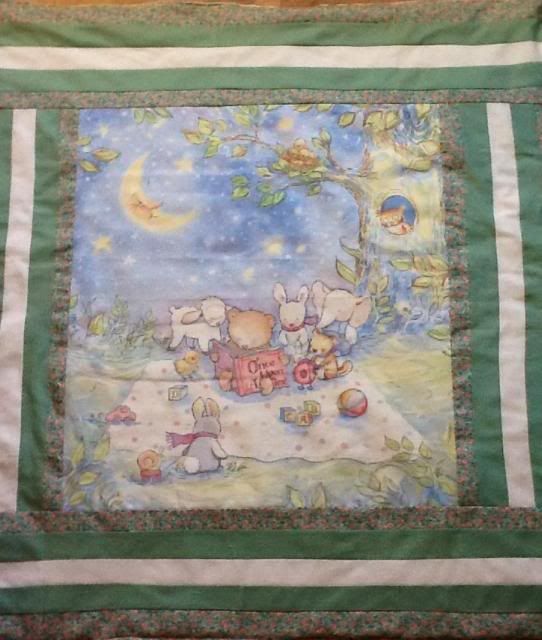
Once Upon A Time Baby Quilt
It's the same 'ole story! I was cleaning on Saturday and I saw this quilt panel in a stack of fabric. I realized that I had fabric border strips ready to go, and they matched the panel perfectly! You guessed it...I grabbed it all up and started sewing! I completed the front of the quilt and was ready to look for fabric for the back. I had enough of the little flower print from the border, but it needed to be washed. Ok, I did that, but it wasn't fast enough. I started milling through the fabrics again, and came across a quilt piece that I had cut up because it got stained when I was quilting it. I won't explain that story. Anyways, there was just enough quilting to do the back of this little quilt. I got it all sewn together and the little flower fabric was through the wash. I ironed it, cut strips and decided to use it for the binding. Next week is Fall vacation and I can finish this little quilt up then. I have enough fabric left to make a carrying bag to match. I just love days off!

Sunday, October 6, 2013
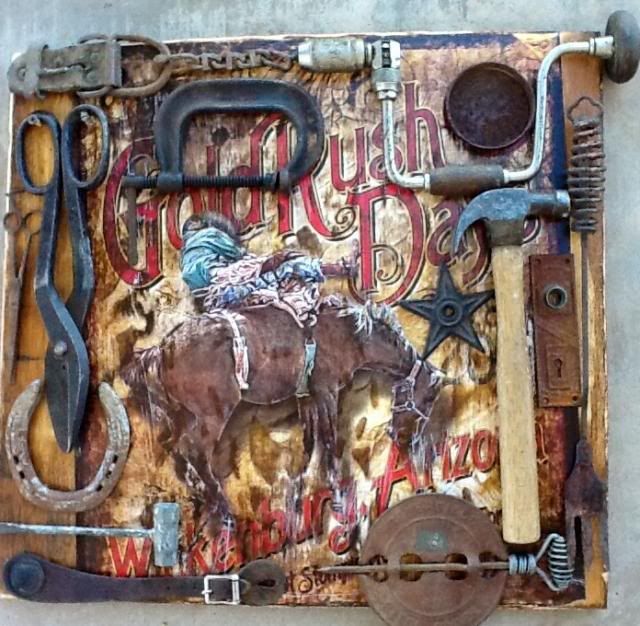
Antique Tool Display
I went in a different direction with my crafts today. I wanted to hang some of my antique tools to display them. I found a piece of wood, sanded it down and the decoupaged a poster from our annual Gold Rush Day's onto the wood. I took a piece of sandpaper and hit a few spots here and there on the poster to make it look older. I used a distressed ink pad to give it some age and depth. I laid out my tools, and placed them on the board. The last step is attaching them to the board and putting a hanger on the back of the wood.

Wednesday, October 2, 2013

Tuesday, October 1, 2013
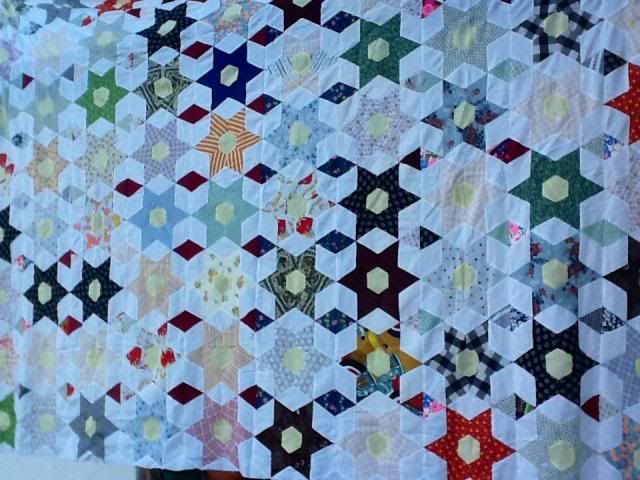
Star Quilt Top
Can you believe it..I found this star quilt top at the same shop that I found the sun bonnet quilt top. I am crazy about it! Are you wondering how in the world are all these quilt tops going to get finished?! Where there's a will there's a way. This one has to be hand quilted because all the pieces are hand stitched. I guess that's why they found a way into my home. Can you keep a secret? There is another one that I will share tomorrow!

Subscribe to:
Comments (Atom)